Team and permissions
The Team card on your Account page lists everyone on your account and lets owners and admins invite, remove and manage them. Open it from the account menu (the person icon in the top right) and choose Account.
Before you start
What you see depends on your role:
- Owner can invite admins and members, change roles, set permissions, remove anyone except themselves, and resend or revoke any invite.
- Admin can invite and remove members, and resend or revoke member invites. An admin can't touch other admins, the owner, or permissions.
- Member sees the list but can't change anything.
Your plan sets the number of seats. See Plan and billing.
Steps
- Open Account from the account menu, then scroll to the Team card. It shows each person's email, role, permissions and join date. You're marked "(you)".
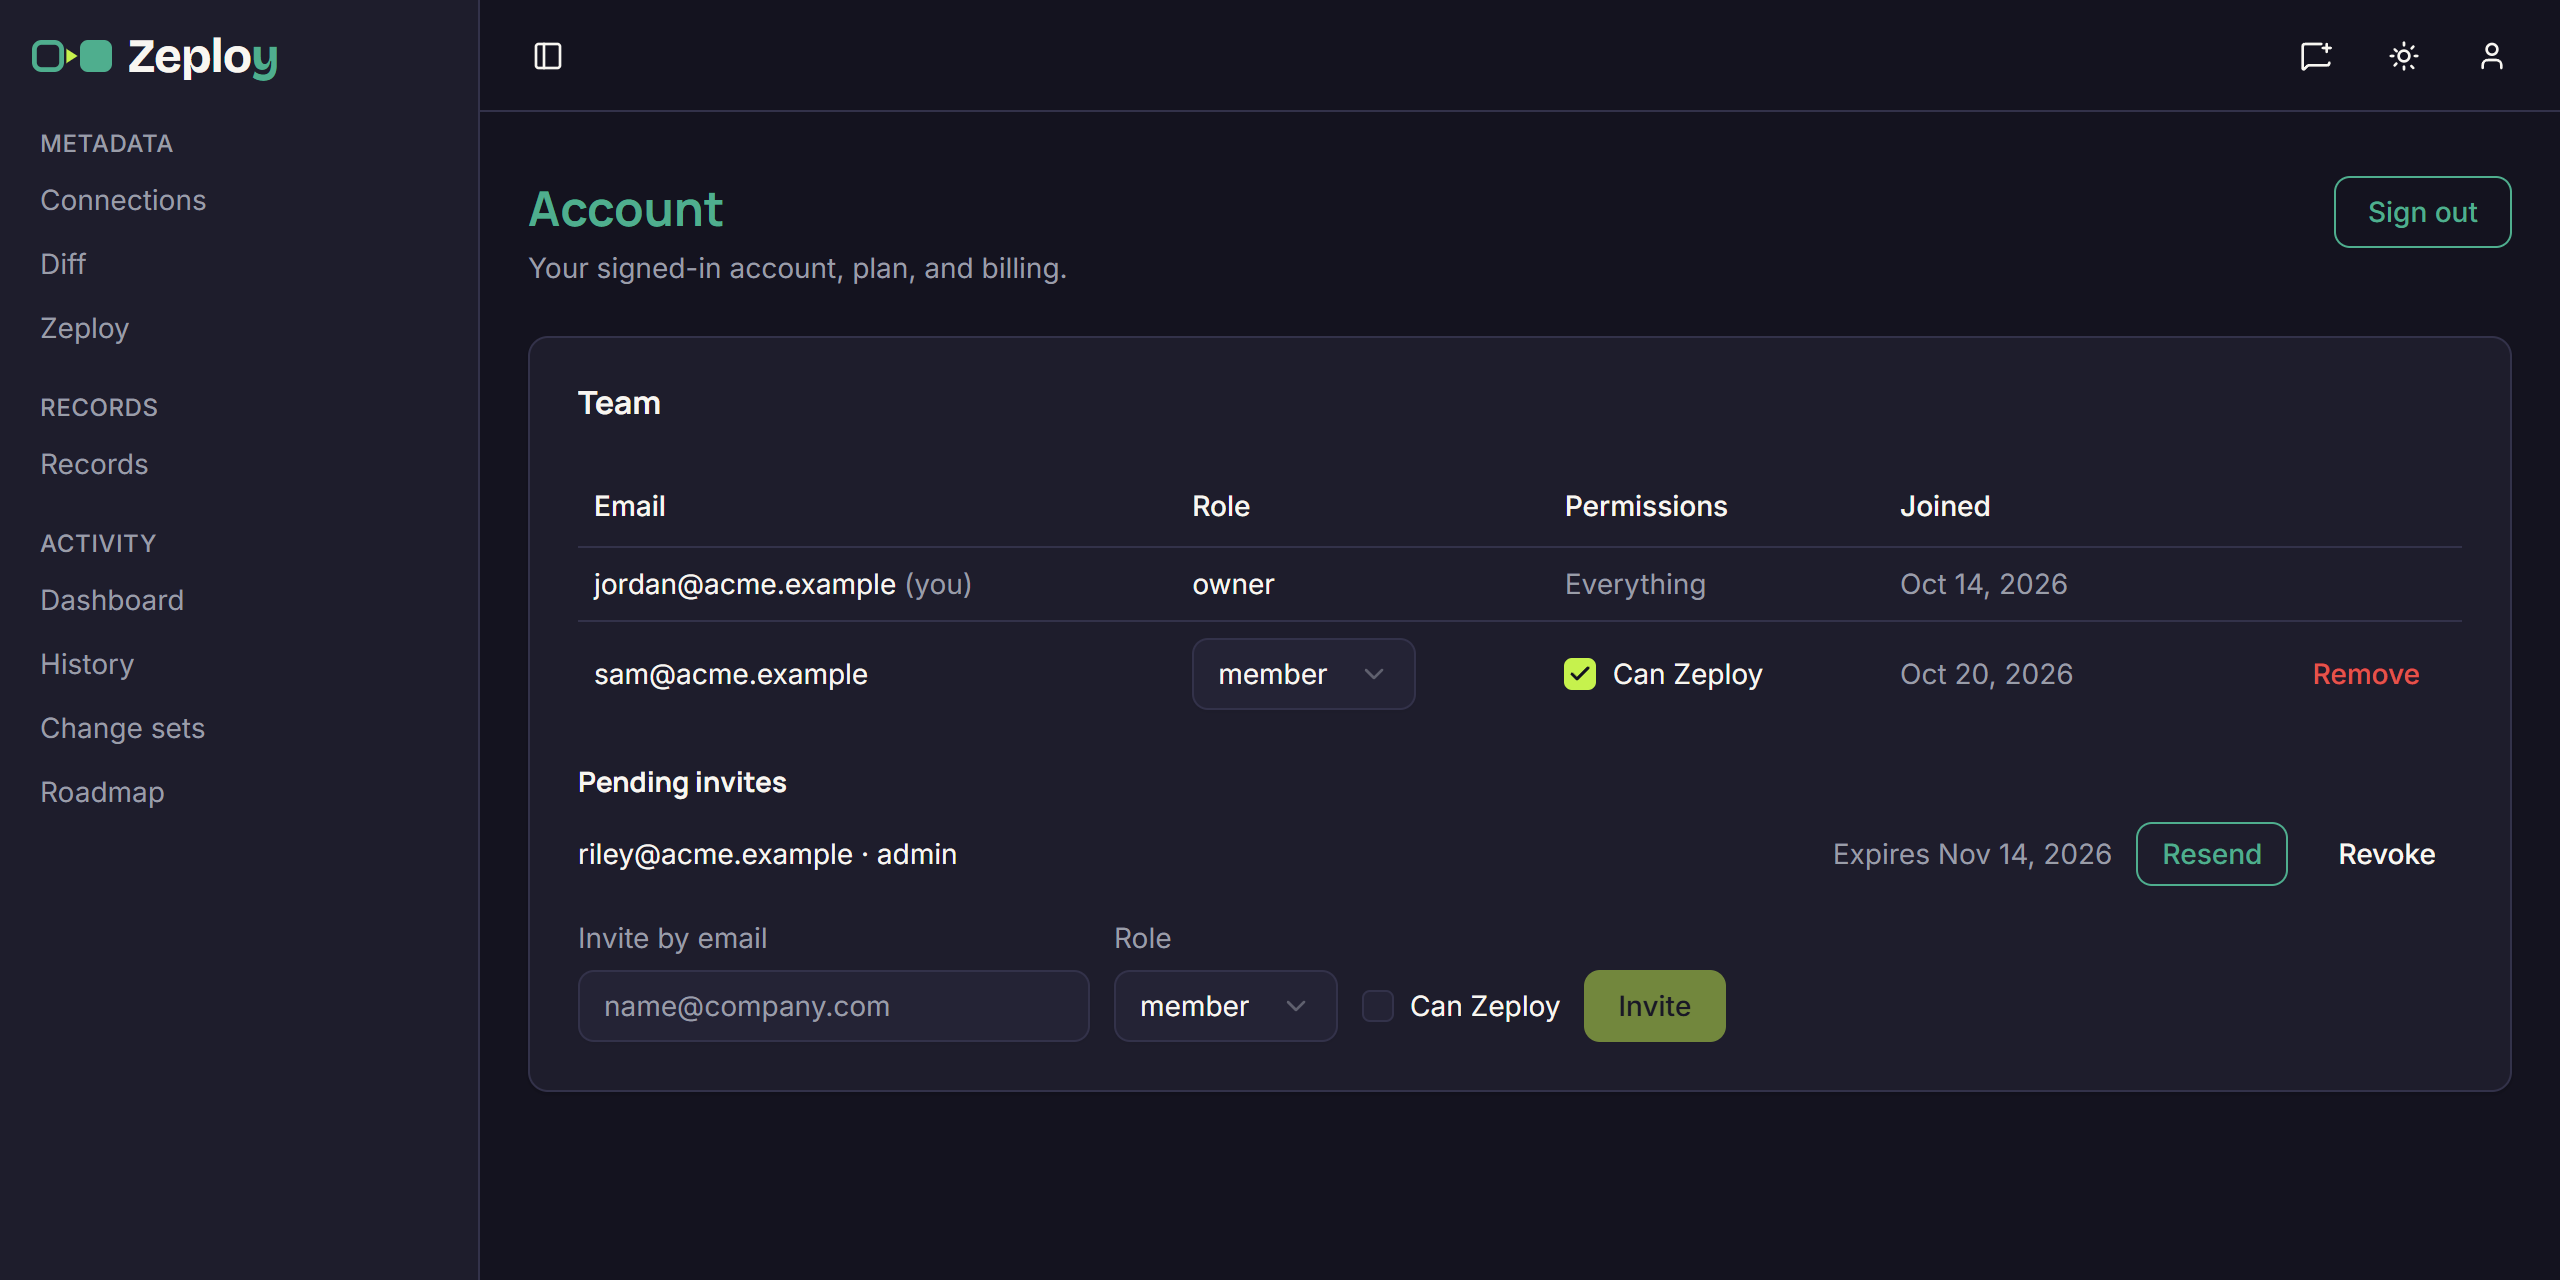
- Invite someone. Under "Invite by email", type their address and pick a Role: member, or admin if you're the owner. Owners also see a checkbox next to the role: Can Zeploy for a member or Manage payment for an admin. Click Invite. The message "Invite sent." appears.
- Track pending invites. Each one shows the address, role and an expiry date ("Expires Nov 14, 2026", or "Expired" in red). Use Resend to email it again or Revoke to cancel it.
- Change a role or permission (owner only). Use the role dropdown on a row to switch between admin and member. Tick or untick the permission checkbox on the row to grant or take it away. You see "Role changed." or "Permission updated."
- Remove someone. Click Remove on their row and confirm. Their login is deleted. Their past Zeployments stay in History, shown as "removed user".
What the permissions mean
- Can Zeploy (members only): lets a member write to any org, in production or sandbox. That covers Zeployments and applying record migrations. Without it a member can still run diffs, Validate, save change sets and use Send for Zeployment, which asks an owner or admin to approve. Owners and admins can always Zeploy.
- Manage payment (admins only): lets an admin update the card and pay invoices. Owners can always do both.
Good to know
- Only the owner can change the plan, cancel it, or close the account. No permission grants those.
- Invites count against your seats. If you're at the limit, the Invite button is disabled and you see "Upgrade for more seats" (owners) or "Ask your account owner to upgrade."
- If an invite is saved but the email fails, you see "Invite saved but the email failed — resend." Click Resend.
- Moving someone to a role where a permission doesn't apply clears that permission.
- Members who lack Can Zeploy can use Request approval for Zeployment. Approvers handle it in Approve or reject.